Porensics
Pwn + Forensics
Description
This was a two-challenge series from the SAINTCON 25 Hacker’s Challenge contest written by my friend Legoclones.
Porensics 1
I’m a huge fan of combining CTF categories into a single challenge. Yet, to this day, there’s one mashup I’ve never seen:
Pwn + …..forensics??
We had the porensics1 binary running on one of our security-critical servers that attackers somehow got access to. We’re not exactly sure how they got on, but we think it was through this service. Luckily, we keep copies of our network traffic for situations just like this. Can you figure out how they got in and what they did? They left no trace on the host.
This is the kind of stuff that IRL defenders have to do when they’ve been compromised by a zero day.
Porensics 2
Well, we were able to get the attackers out and added some mitigations to the binary, but apparently they got in again??
Note - I provided the libc, but if you really want it, I ran it on the legoclones/pwn:ubuntu-24.04 Docker container
Writeup
This kind of challenge was right up my alley. I’m a pwn main in CTFs and I do threat hunting/IR for CCDC, so this was a perfect combination of my interests.
Porensics 1
The first challenge provided two files: the porensics1 binary and a pcap file. There was no provided remote server as in traditional pwn problems, so I assumed the flag for this challenge would be hidden in the pcap somewhere. Opening the pcap in Wireshark revealed two TCP Streams (right click -> Follow -> TCP Stream):
 TCP Stream 0 (hex dump format)
 TCP Stream 1 (hex dump format)
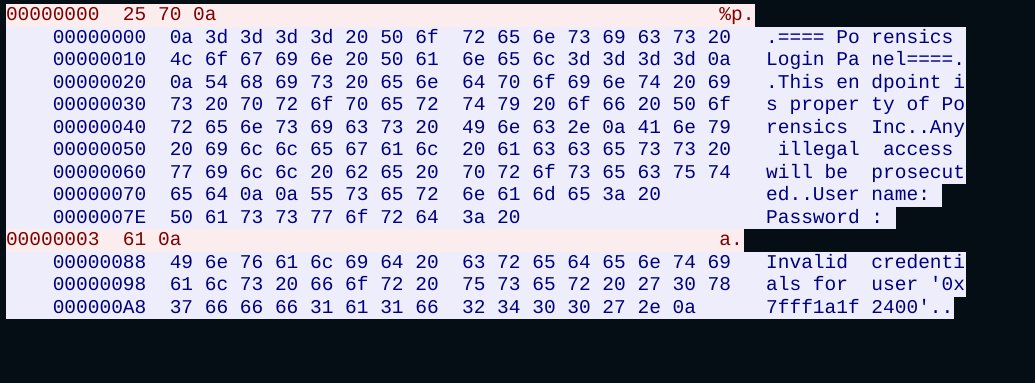
I also decompiled the porensics1 binary in Binary Ninja to understand its functionality. The binary simply sets up a TCP listener on port 1337 and implements a basic “login panel”. It doesn’t actually log you in to anything, but it does ask the client for a username and password upon connecting. Only username admin and password password will result in a “successful” login; all others will cause the program to exit.
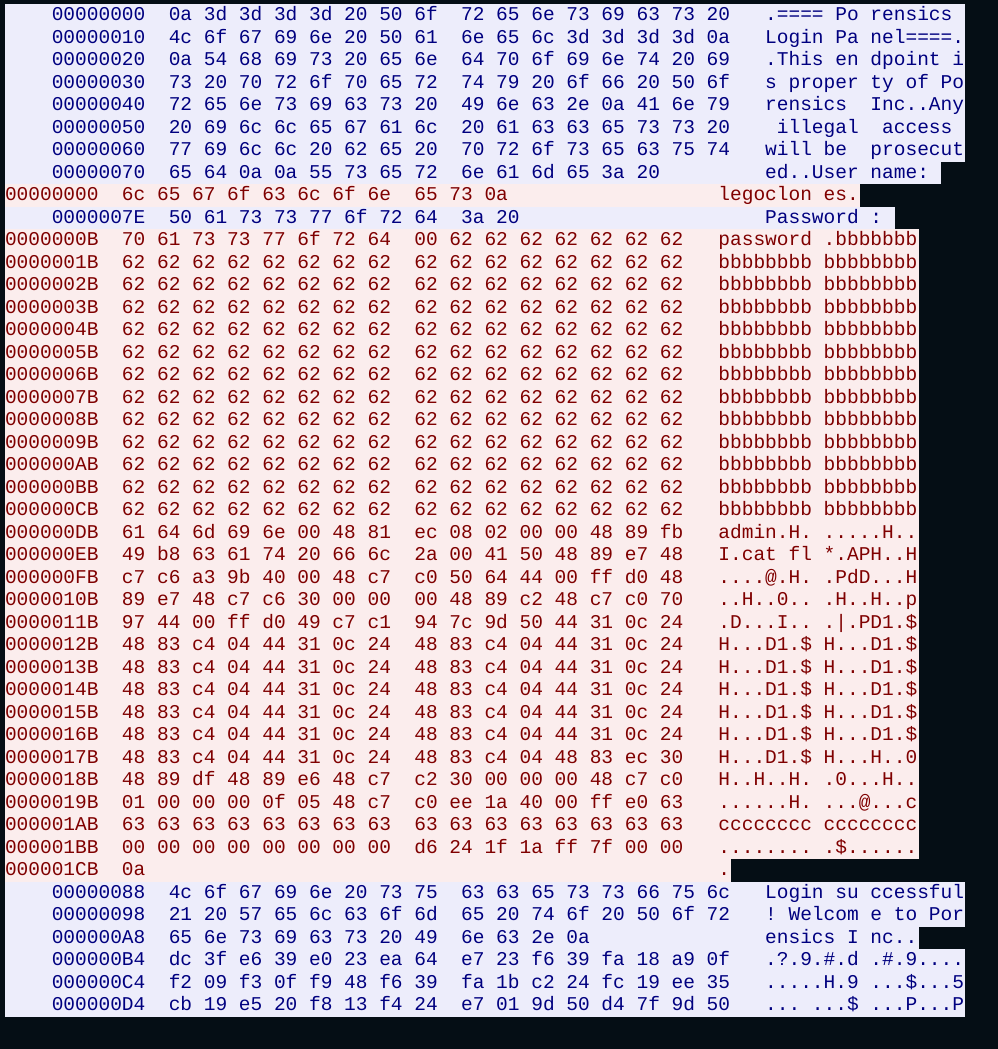
Returning to the pcap, in this case, the red text is the client/attacker, and the blue is the server. Since there are two streams, the client initiates a connection to the server twice. Upon first glance, there wasn’t anything that looked like a flag. However, in the second TCP stream (stream 1), the attacker sent cat fl*, which would print the flag assuming it was ran in an execve call or similar. You’d expect the flag to show up in plaintext in the server’s output, but instead, after the login banner there appears to be a bunch of “garbage” output. I knew there had to be something more going on here, so I decided to dive deeper into the exploit payloads.
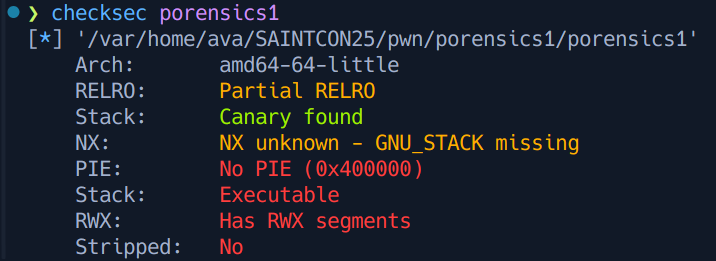
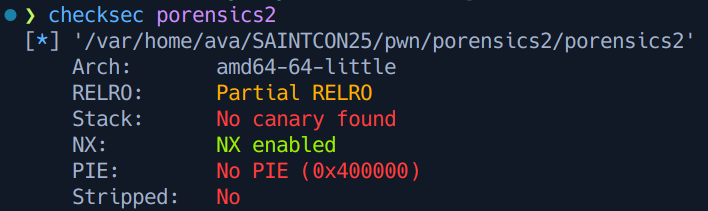
At the time of solving this challenge, I actually skipped the first TCP stream and made some educated guesses to reverse the second TCP stream. Running checksec on porensics1 shows its enabled protections, most notably the absence of the NX bit:
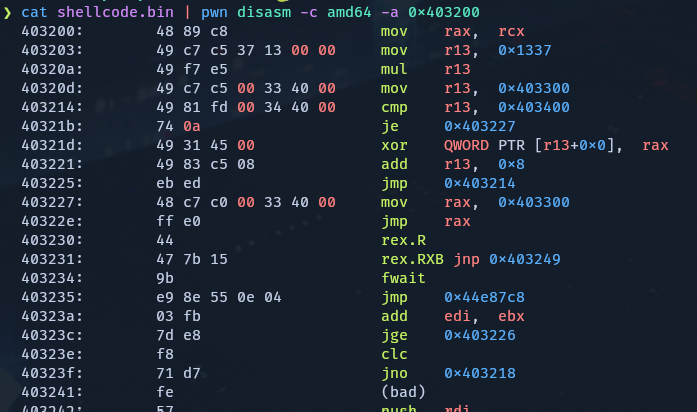
I made an educated guess that the unprintable characters in the payload for the second TCP stream was shellcode, since the absence of NX was an obviously intentional security problem. I extracted the raw bytes of the supposed shellcode into a file and attempted to disassemble it using the pwn command line tool, revealing my guess to be correct:
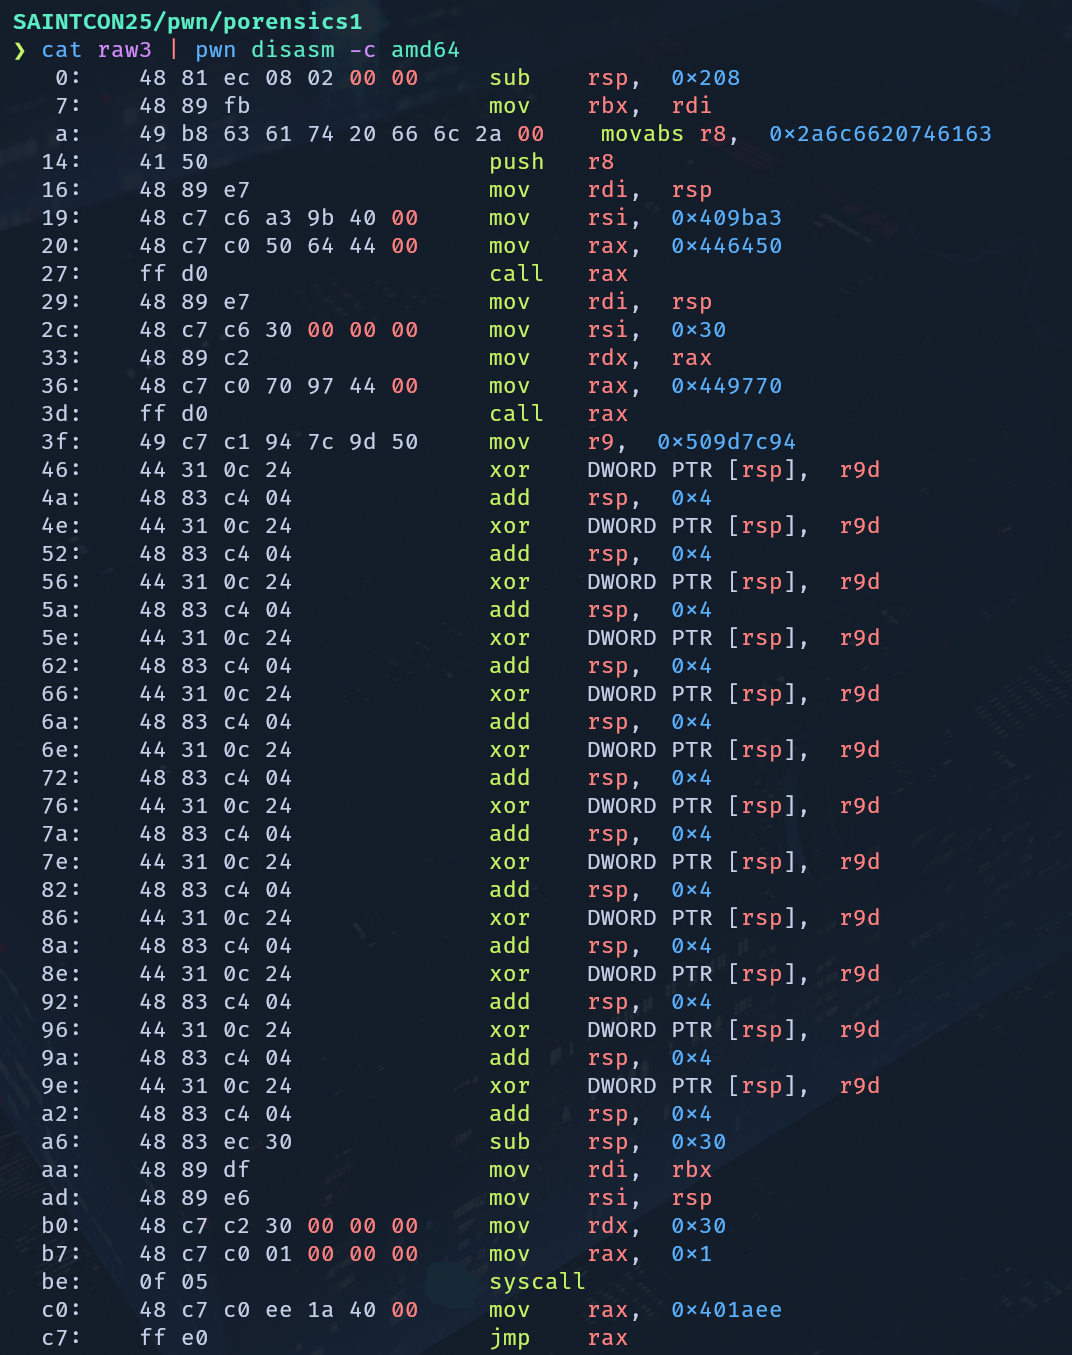
This explains the “garbage” output I noticed in the pcap earlier. The first part of the shellcode through offset 3d sets up registers and calls popen to get the output of cat fl* and then calls fgets to put it onto the stack. The most important part is what comes after that - a series of XOR statements that XOR the flag with 0x509d7c94 before making a syscall to write it to stdout. This explains why the output in the pcap looked like it did, and what I needed to do to reverse it. XOR is its own inverse, meaning that XORing the output in the pcap with 0x509d7c94 (accounting for endianness) would reveal the original flag:
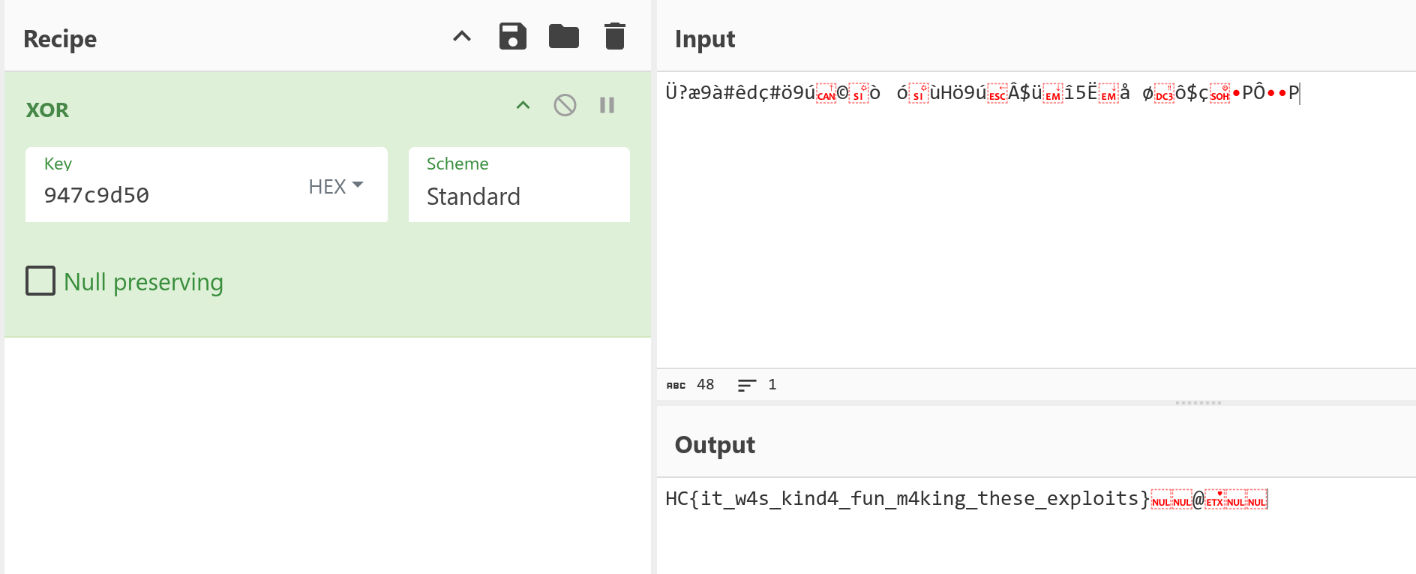
Flag: HC{it_w4s_kind4_fun_m4king_these_exploits}
Porensics 2
This challenge was a notable step up in difficulty from the first challenge. First, the mitigations on the binary were strengthened:
Not shown here is another factor - while the first binary was statically compiled, this one was dynamically compiled. With NX enabled (but PIE disabled), this meant that the most probable exploit path was to create a ROP chain and obtain a libc leak in order to create a second ROP chain to somehow print the flag.
While this guess was correct, what made this challenge tricky was that the shellcode was not actually just shellcode - it was “encrypted” somehow. Decompiling the shellcode (third payload) showed some valid instructions that eventually would progress into invalid instructions and SEGFAULT when ran in a debugger.
After a lot of trial and error, I eventually discovered why - this shellcode was self-modifying! If you look closely, the valid shellcode is XORing the shellcode starting at address 0x403300 and onward with the value contained at the address in r13. However, r13 contains a libc address, meaning its value is going to be different on each run of the program. That meant I would have to extract a libc address from the pcap, compute its base address, and compute the proper offset of r13 on that base address in order to properly decode the shellcode. Doing so revealed shellcode much like the last challenge printing an “encrypted” (XORed) flag, which I was able to “decrypt” to earn the real flag:
Flag: HC{encrypt3d_sh3llc0d3_g03s_h4rd!}